

How to test stripe webhooks locally
The new Stripe CLI is real, and it's spectacular 😎


In this article, I'm going to walk you through how to get started with testing stripe webhooks locally using the new Stripe CLI tool. This will allow you to simulate a real stripe API response to your locally running application. If you'd like to test your application running on localhost and determine how it would interact with Stripe webhooks, this will show you how to get started.
What are Webhooks?
When an event happens in an application, webhooks allow for information about that event to be sent to URLs you specify.
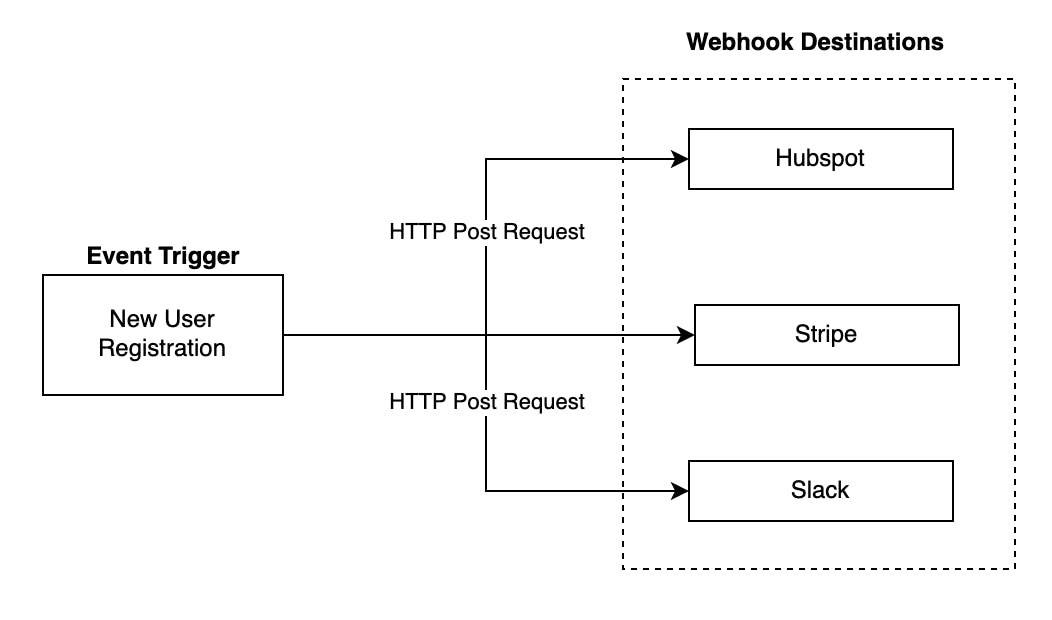
In this example, when a user registers in the application, the webhook triggers HTTP Post requests to the following destinations:
- Hubspot (our CRM)
- Stripe (our payment processor)
- Slack (to notify our sales team)
This could be sent to an (almost) unlimited number of destinations. The information sent to these destinations typically contains information related to the event.
Stripe Webhooks
Before the CLI
In our application, we want to listen for Stripe webhooks being sent to our application. However, how do we listen for Stripe webhooks when our application is running locally? Until recently, we needed to use tools like ngrok which gives your local computer a public URL that Stripe could send its webhook events to. However, this required us to register the webhooks each time we start ngrok because the public url changes each time we turn the ngrok tunnel on.
Stripe has now introduced the Stripe CLI, a mult-tool CLI that includes webhook local development!
Getting Started
Step 1: Installation
Follow the installation instructions here. The documentation will ask you to login with your Stripe credentials, so be sure you have a Stripe account set up.
Step 2: Prepare Your Application to Receive Webhooks
Your application will need to have a route dedicated to listening for Stripe webhook events. My application's url is /webhooks/stripe.
Once you have a route dedicated for listening to Stripe webhook events, you should also check that the webhook request is an authentic request coming from Stripe. This is done by verifying your Stripe webhook's signing secret. Check the Stripe documentation on verifying signatures. This step uses a secret key obtained in our next step.
Step 3: Forward Webhooks to Your Local Application
With our Stripe CLI installed and authenticated, we can send Stripe events to our local application. Because my webhook url is /webhooks/stripe and my application is running on port 8000, the url I will point the webhooks to is http://localhost:8000/webhooks/stripe
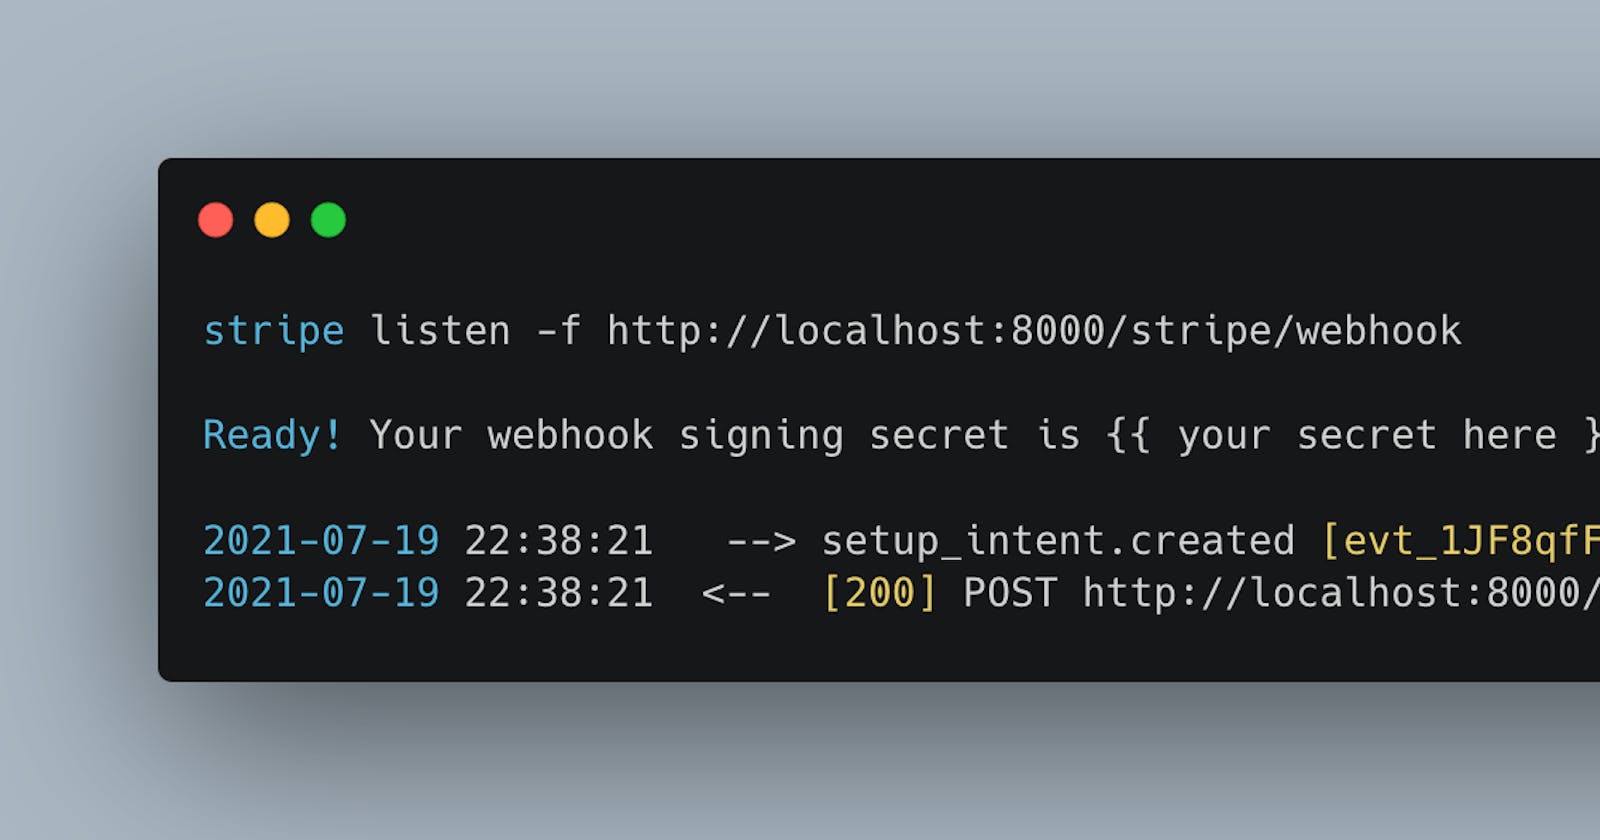
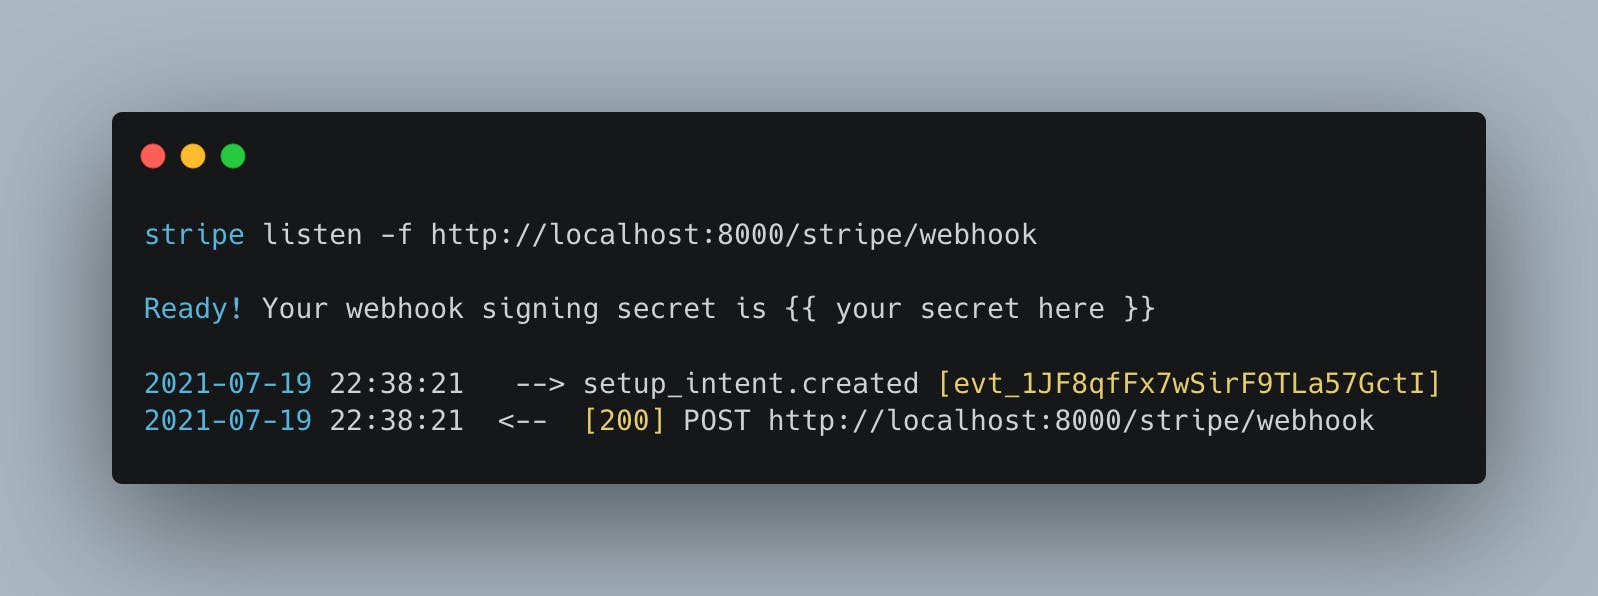
To turn it on, let's run:
stripe listen --forward-to http://localhost:8000/webhooks/stripe
This should return a response in the console like:
Ready! Your webhook signing secret is <your signing secret>
The signing secret is what is used in the previous step to verify the signature.
You can now see webhooks being sent to your local application in real time:
I hope you enjoyed this walk through on getting started with Stripe Webhooks with the CLI. I recently implimented this myself and found it to be so much easier 🤩.
Stripe hit another tooling home run!